The Ronchigram
Experiment: Load a test specimen of polystyrene spheres,
shadow coated with gold particles on a carbon film. Line up
the microscope as usual in normal TEM mode. Select the
largest condenser aperture and centre it.
Ask the demonstrator: Show me how to put the microscope into
STEM mode, with the scan switched off. Please align the
condenser lens, aperture and stigmators, and objective
rotation centre, so that I can see a reasonably well-aligned
Ronchigram.
Lets start by not actually scanning the probe at all.
Examine what we see on the phosphor screen at the bottom end
of the electron microscope. The rays coming out of the
sample have conical shape, formed by the condenser aperture,
and this cone eventually hits the phosphor screen, where it
forms a bright circle. The circle is called the 'Gabor
hologram', the 'Ronchigram' or the 'central zero-order disc
of the convergent beam electron diffraction pattern'
depending on the context and whose talking about it. I'm
going to call it the Ronchigram. It provides the best way
of lining up a STEM, and it will also teach us a lot about
electron lens aberrations.
Experiment: Look at the Ronchigram. Start by going through
focus on both C2 and the objective lens. Move the specimen.
You will find that the Ronchigram looks pretty odd, a sort
of fish-eye view of the specimen. Go through focus with
either the objective or C2. If you want to increase the
contrast, go up in spot size. Weird shapes move in and out.
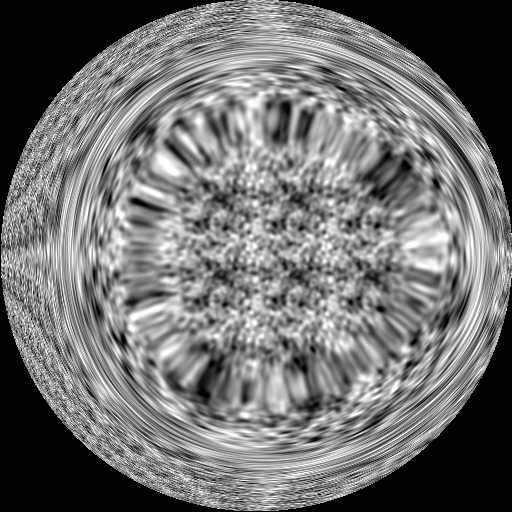
If the microscope is well aligned, the Ronchigram from an
amorphous specimen should look something the next figure,
which has been calculated in a computer:
Well, why does the Ronchigram look like this? As a first
approximation, what we should see is a shadow image cast by
the specimen which reverses as we change the cross-over of
the beam near the specimen, as shown below:
When the beam is crossing over exactly at the specimen,
there will be a burred mess over the whole disc (middle
picture above). If the specimen has some feature, like the
curly P above, then above and below focus we see a
shadow of that feature cast onto the central disc, and
magnified according to how far away the beam cross-over is
above or below the specimen.
Experiment: Turn C2 from a zero setting, slowly increasing
its strength. You should see the image reversal. All this
occurs at a rather low setting of C2. At higher settings,
the Ronchigram may get focussed into a bright spot and
undergo a second reversal. However, this reversal is to do
with the way we are using the lower part of the microscope
(below the specimen plane) to image the cone of illumination
coming out of the specimen. Concentrate on the low settings
of C2.
In fact, the behaviour of image is much more complicated
than the figure above suggests because of the effects of
aberrations in the lens. All sorts of aberrations may be
present in C2, but these tend to over-focussing high angle
beams (ones that pass well off-centre), bringing them to an
premature focus, i.e. a focus that is nearer the lens than
it should be.
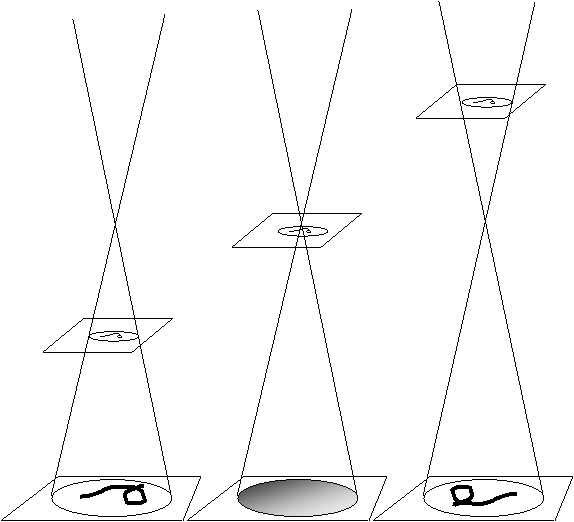
To understand this, first consider a perfect lens. A perfect
lens, by definition, focuses all beams from the source to a single
point, as shown below.
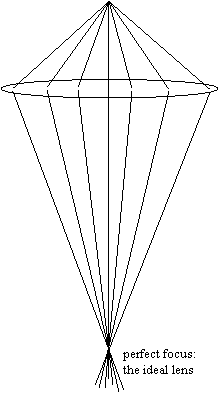
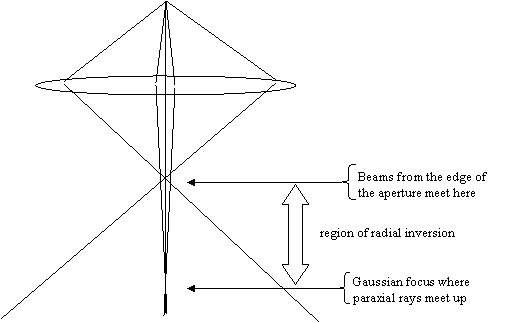
If we have aberration presents, high-angle beams tend to
be over-focussed, so that they focus at a plane above the
plane of perfect focus, like this:
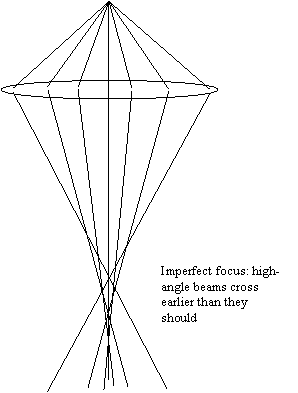
How is this extra complication going to affect what we see
in the Ronchigram? Start by thinking about just two sets of
beams: two which are virtually 'paraxial' (which means that
they are travelling very close the centre of the lens) and
which therefore come to the correct focal point of the lens
(a point which is called the Gaussian focus); and two which
are at very high angle, or close to the very edge of the
condenser aperture, as shown below.
Now, when the probe-forming lens is highly over-focussed
(which in this experiment means that C2 is moderately
excited), all the beams, including the paraxial and high-
angle beams, cross-over before they reach the specimen. What we see is just
a shadow-image Ronchigram as we would expect, although there
will be a slight change in magnification between areas near
the centre of the Ronchigram and its edge.
Similarly, when the lens is highly under-excited, we see a
reversed shadow image, again slightly distorted in
magnification. However, near focus there is a peculiar
region which I have called the 'region of radial inversion'
in the figure above. When the specimen is lying somewhere in this
region (or the lens has been adjusted accordingly), paraxial
beams are crossing below it, but high-angle beams are
crossing above it. In the Ronchigram, the centre of the
pattern has undergone a reversal, the edge of the pattern is
still in the over-focussed orientation.
Experiment: On a well-aligned Ronchigram, focus C2 so that
the magnification of the image is at maximum. Under-focus
slightly and move the specimen. You should be able to find
a condition where the centre of image moves in one
direction, while the outer area moves in the opposite
direction. If you do, then you are within the region of
radial inversion. If all you can see are streaking effects
and asymmetric stretching of areas of the Ronchigram, then
the lenses have not been lined up properly, or the astigmatism
in the condenser lens has not been corrected.
Look again carefully at the artificial Ronchigram:
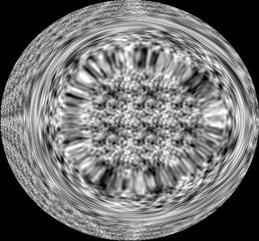
There are two
characteristic rings, which you should be able to see
experimentally as well. When the focus is set within the
region of radial inversion, there is a central circular area
where we see just a normal shadow image at rather high
magnification. There is then a ring where everything is
streaked out in the radial direction: this is called the
ring of infinite radial magnification. At a higher radius,
there is a ring where everything is streaked out into a
circular pattern: this is called the ring of infinite
azimuthal magnification. We don't have to understand why
this happens like it does - it is all to do with the
mathematics of how much the rays miss Gaussian focus as a
function of their angle through the lens.
What is important is that the Ronchigram must be circularly
symmetric if you want to get a good STEM image.
Experiment: Put the C2 stigmators onto their coarsest
setting, and change them by a large amount. Watch the
Ronchigram as a function of C2 defocus, especially at or
near Gaussian focus (i.e. when you can see a highly
magnified blob at the centre of the Ronchigram). You should
see streaking shapes, which are like ovals or figures of
eight.
If you can't see any of the effects we've talked about, then
the lenses are not properly aligned. Lets first discuss in more detail how
the lenses are arranged...


Copyright J M Rodenburg
| 